Accessing a Mulesoft API mock with curl
Using curl to access a Mulesoft API mock requires a little trick. Mulesoft gives you the ability to test out a mock of your API design. The easiest way to try the API is to click on the Documentation button on the right side of the API Designer, select an endpoint, and click “Try it.” If you have made the mock public, you can also use curl to test, but there is a little trick to using curl.
Google Apps Script: Spreadsheet to Document
For an explanation of this script, see Jeffrey Everhart’s excellent introduction to Apps Script.
function onOpen() {
  const ui = SpreadsheetApp.getUi();
  const menu = ui.createMenu('AutoFill Docs');
  menu.addItem('Create New Docs', 'createNewGoogleDocs')
  menu.addToUi();

}

function createNewGoogleDocs() {
  //This value should be the id of your document template that we created in the last step
  const googleDocTemplate = DriveApp.getFileById('1It9mTOqk0dVyPVaxmjRXa5tXdWMzgsaDxvb4Nm11nsM');

  //This value should be the id of the folder where you want your completed documents stored
  const destinationFolder = DriveApp.getFolderById('1jeg1V6q1ZJ6OWz-A4LNS5f8GtE9x4SQ4')
  //Here we store the sheet as a variable
  const sheet = SpreadsheetApp
    .getActiveSpreadsheet()
    .getSheetByName('Data')

  //Now we get all of the values as a 2D array
  const rows = sheet.getDataRange().getValues();

  //Start processing each spreadsheet row
  rows.forEach(function(row, index){
    //Here we check if this row is the headers, if so we skip it
    if (index === 0) return;
    //Here we check if a document has already been generated by looking at 'Document Link', if so we skip it
    if (row[5]) return;
    //Using the row data in a template literal, we make a copy of our template document in our destinationFolder
    const copy = googleDocTemplate.makeCopy(`${row[1]}, ${row[0]} Employee Details` , destinationFolder)
    //Once we have the copy, we then open it using the DocumentApp
    const doc = DocumentApp.openById(copy.getId())
    //All of the content lives in the body, so we get that for editing
    const body = doc.getBody();
    //In this line we do some friendly date formatting, that may or may not work for you locale
    const friendlyDate = new Date(row[3]).toLocaleDateString();

    //In these lines, we replace our replacement tokens with values from our spreadsheet row
    body.replaceText('{{First Name}}', row[0]);
    body.replaceText('{{Last Name}}', row[1]);
    body.replaceText('{{Hours}}', row[2]);
    body.replaceText('{{Date Completed}}', friendlyDate);

    //We make our changes permanent by saving and closing the document
    doc.saveAndClose();
    //Store the url of our new document in a variable
    const url = doc.getUrl();
    //Write that value back to the 'Document Link' column in the spreadsheet.
    sheet.getRange(index + 1, 6).setValue(url)

  })

}How to Enable Multi Factor Authentication (MFA) on your IEEE Email Account
If you’ve been around IEEE for a long time, you remember when your email address ____@ieee.org was just an alias that forwarded all email to your actual email provider. However, in 2013 the IEEE partnered with Google to create an actual Gmail account for your IEEE email address. While the intent behind this benefit is certainly appreciated, it was actually an inconvenience for many of us who were already established with an email provider. We didn’t want to migrate our entire digital live to IEEE’s new Gmail account. I wrote a popular blog post back in 2013 about how to configure your IEEE Gmail account to forward 100% of all email to your actual email provider.
Running Unity games via Steam in Linux
There seems to be a lot of confusion about how to run games built on the Unity engine distributed by Steam on a Linux system. I recently solved this problem after backing the promising survival sandbox game Planet Nomads on Kickstarter. Here is how to configure an Ubuntu Linux system and launch Planet Nomads successfully.
Prerequisites
If you have an Nvidia card, you must download and install the official proprietary drivers provided by Nvidia. I could not get Unity to launch with the open-source drivers. Once I installed the proprietary (closed source) drivers, I was able to launch Planet Nomads from the Steam application.
Configure CentOS/RedHat VMs with Kickstart files on Virtualbox
Kickstart is a type of file that’s used to automatically install RedHat or CentOS Linux on a physical or virtual server. If you are managing more than a few servers, it’s a good idea to configure the servers via kickstart files instead of logging in and configuring each one manually. However, some unfortunate choices were made when defining the Kickstart file format, and it’s not the easiest thing to use. When creating a new Kickstart or making major changes, it’s good to have way to quickly iterate and test your changes. Iterating on a Kickstart file is slow and inconvenient in an enterprise environment in which a freshly booted server obtains an image and Kickstarter file via PXEboot. To speed up Kickstart testing and debugging, I’ve developed a simple way to use Kickstart files with CentOS/RedHat guest virtual machines that run in VirtualBox on my Mac. This process should also work with Windows or Linux hosts. When the RedHat installer is booting, it looks for a file called ks.cfg on a volume with label OEMDRV. First, we will create this volume as a small virtual disk image. On a Mac, you can create this image with Disk Utility as shown below. Note that the Name needs to be OEMDRV (though you can make the filename anything you want). Create OEMDRV disk image OSX Disk Utility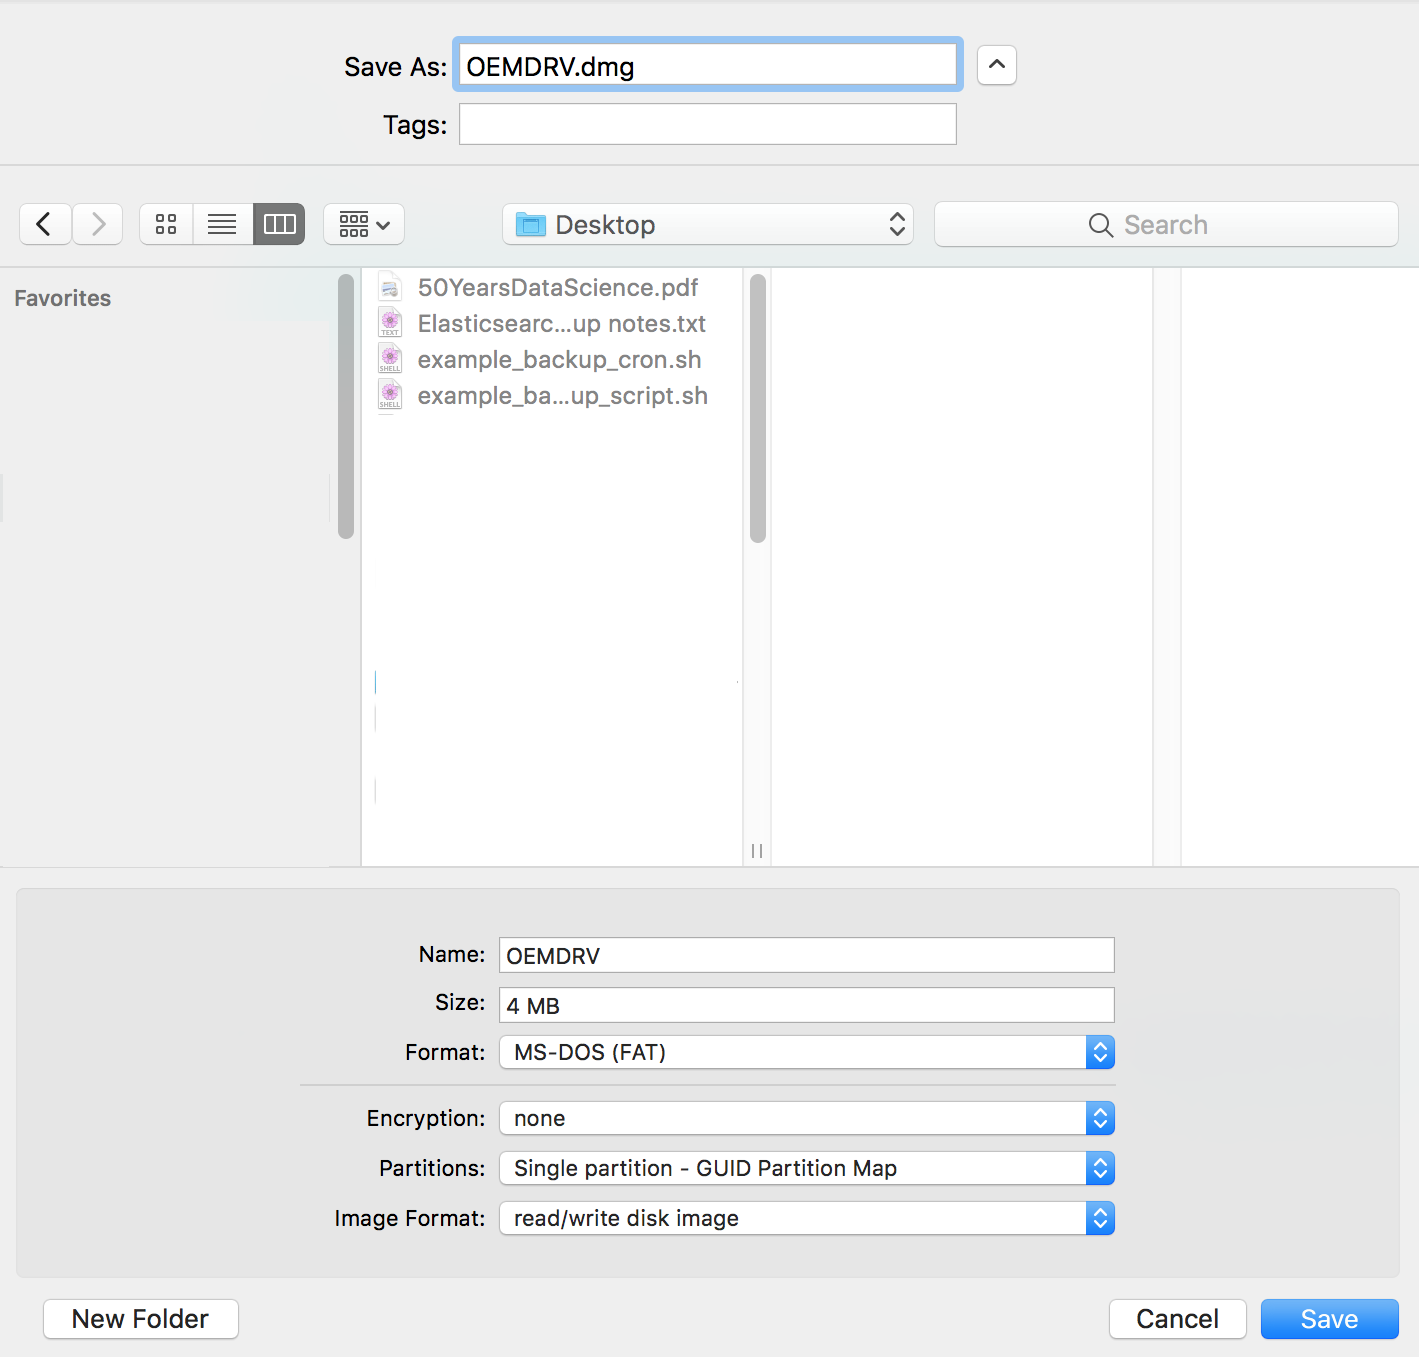
General error: 2006 MySQL server has gone away
“MySQL Server has gone away” is a cryptic error that can be hard to troubleshoot (look at all the various responses on Stack Overflow!) Many problems can cause this error; I would like to document one specific case. In this example, the client is a PHP app using the Phalcon framework:
[Mon, 09 Apr 18 03:34:08 -0400][ERROR]  SQLSTATE[HY000]: General error: 2006 MySQL server has gone away
exception 'PDOException' with message 'SQLSTATE[HY000]: General error: 2006 MySQL server has gone away' in /path/to/ModelBase.php:
Stack trace:
#0 [internal function]: PDOStatement->execute()
...
#17 {main}
This error can be tricky to troubleshoot. I looked in three logs:
Viewing logs for a cluster of instances on Google Stackdriver Logging
StackDriver Logging is a great feature of Google Compute Engine (GCE). You pretty much need a centralized logging solution if you are taking maximum advantage of the features offered by GCE. For example, most production applications will run on a cluster of web servers. If you set up the cluster as a managed instance group on GCE, Google can auto-scale the size of the cluster based on traffic. The challenge is that it’s much harder to troubleshoot errors across a cluster. The requests that caused the error could be spread across any number of servers, with randomly assigned names. If load drops and the server pool contracts, you will entirely lose any log data on a server that’s auto-deleted. StackDriver Logging is the answer to this problem. Configure all servers to send all logs to StackDriver, and you can view all of your web server logs in one interface, with the entries in chronological order. View StackDriver Advanced Filter as a Gist on GitHub The problem is that the Stackdriver docs only explain how to select an instance by the instance ID, which is a random-looking string that is not visible in the Console. Further, if you have a large cluster of disposable servers, you would have to look up the ID for every instance. If an instance was deleted when the cluster was auto-scaled, you won’t even know what to look up. Therefore, it’s much better to search for the logs based on a human-readable server name. For example, assume that your servers are Google Compute Engine instances that are named [region]-[zone]-web-[id]. Here’s a filter to match on that naming convention: [sourcecode language=“plain”] resource.type=“gce_instance” logName=“projects/my-project-name/logs/apache-error” labels.“compute.googleapis.com/resource_name”:"-web-" textPayload:“execution time” [/sourcecode]
Run DSSP with GROMACS 4.5.5 on Red Hat Linux
UPDATE
A new version of GROMACS (4.6 series) has been released since this post was written. Please try installing the latest version of GROMACS before attempting the steps in this post.
Fixing GROMACS
There is a bug in the do_dsspcommand in GROMACS 4.5.5 that prevents the analysis of secondary structure using DSSP . Attempting to rundo_dssp will result in a segmentation fault. The bug has been patched since 4.5.5, but this version has not been released (see this post on the GROMACS mailing list). To get the patched version, follow the instructions from this post.
Mini Maker Faire Orlando Report: Electronics
In my previous post about the Mini Maker Faire Orlando, I described some of the cool hardware that was on display. In this post, I’m going to describe some of the electronics available from local vendors.
Electrimod
Electrimod MiniStack