Posts
Configure CentOS/RedHat VMs with Kickstart files on Virtualbox
Kickstart is a type of file that’s used to automatically install RedHat or CentOS Linux on a physical or virtual server. If you are managing more than a few servers, it’s a good idea to configure the servers via kickstart files instead of logging in and configuring each one manually. However, some unfortunate choices were made when defining the Kickstart file format, and it’s not the easiest thing to use. When creating a new Kickstart or making major changes, it’s good to have way to quickly iterate and test your changes. Iterating on a Kickstart file is slow and inconvenient in an enterprise environment in which a freshly booted server obtains an image and Kickstarter file via PXEboot. To speed up Kickstart testing and debugging, I’ve developed a simple way to use Kickstart files with CentOS/RedHat guest virtual machines that run in VirtualBox on my Mac. This process should also work with Windows or Linux hosts. When the RedHat installer is booting, it looks for a file called ks.cfg on a volume with label OEMDRV. First, we will create this volume as a small virtual disk image. On a Mac, you can create this image with Disk Utility as shown below. Note that the Name needs to be OEMDRV (though you can make the filename anything you want). Create OEMDRV disk image OSX Disk Utility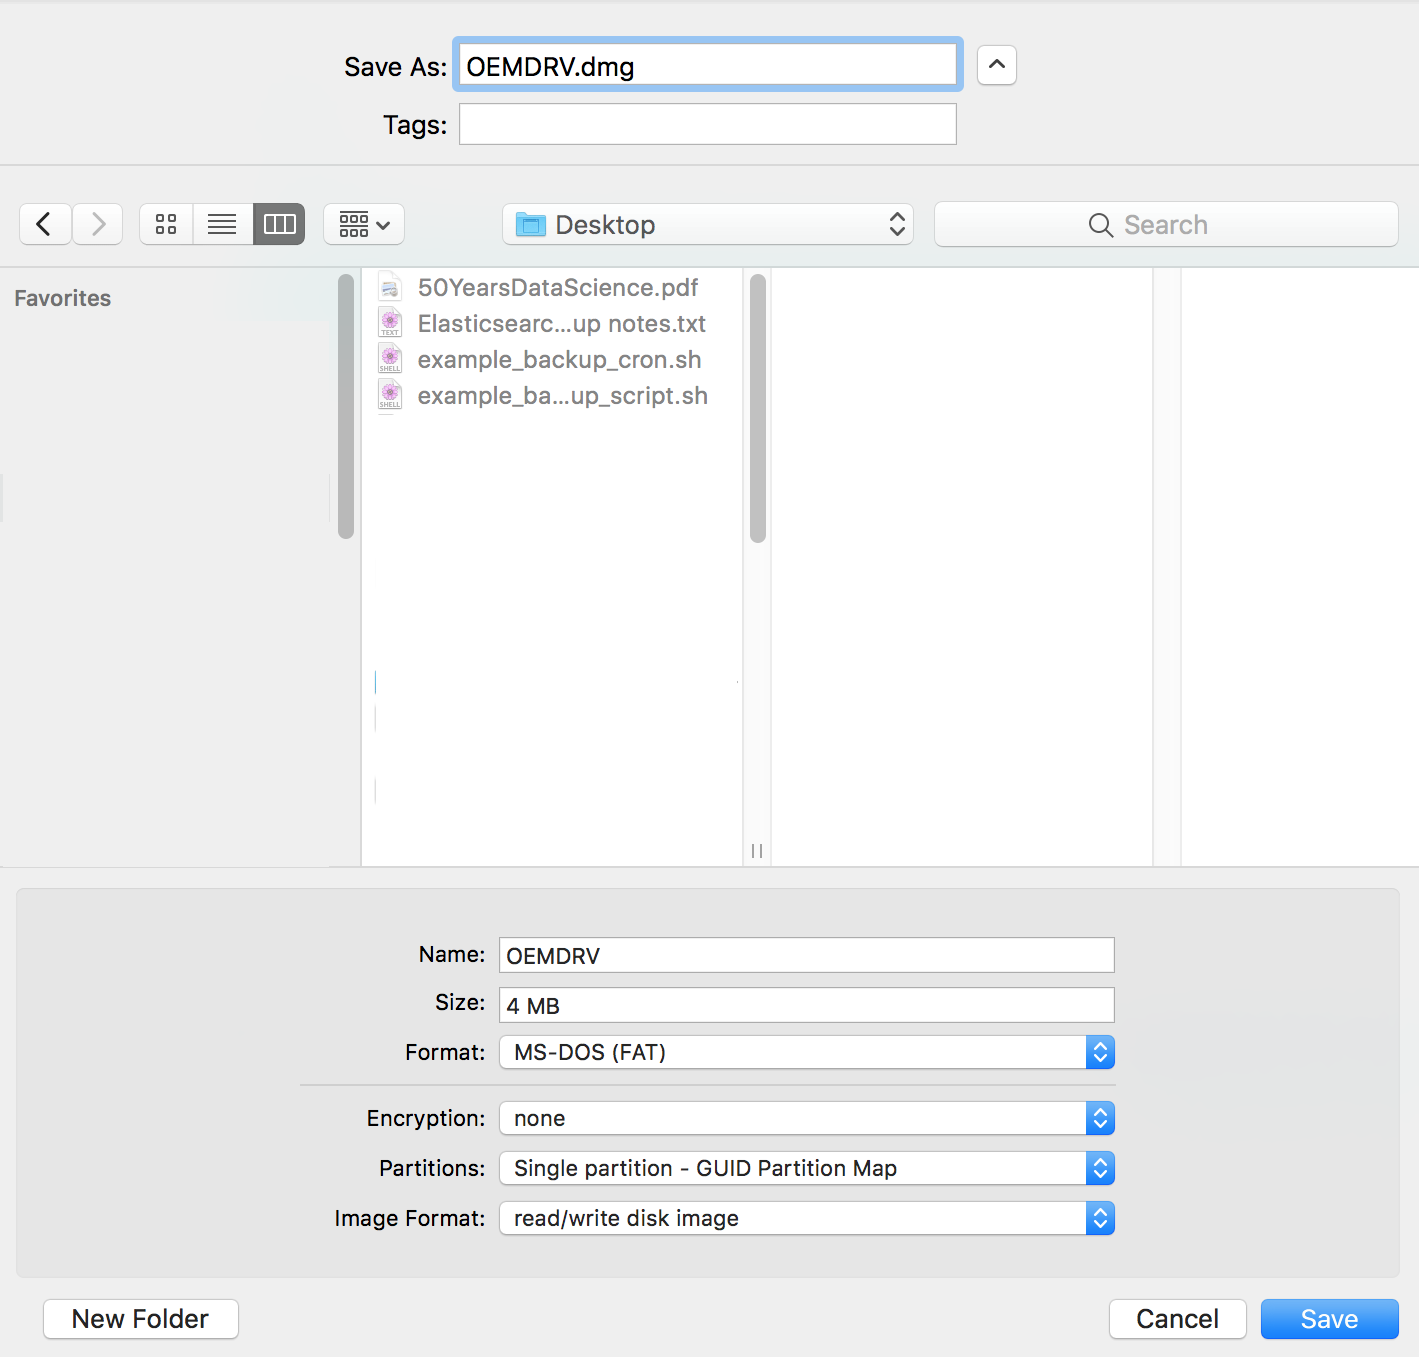
Service account credentials with the Python client for the Google Drive API (v3)
EDIT: Get the full code for this post on Github. This article only contains important snippets of code that require explanation.
There are numerous ways to authenticate against the Google Drive API. If you have an application running on Google Compute Engine that needs to access Drive, a Service Account is probably the easiest way to do it. One use case is for an application to write reports or log files to Drive so that users can see them without logging into a server. Before you try this example, go through all of the steps in Google’s Using OAuth 2.0 for Server to Server Applications guide and save your service account’s private key locally in JSON format. Getting credentials from a service account file is easy:
General error: 2006 MySQL server has gone away
“MySQL Server has gone away” is a cryptic error that can be hard to troubleshoot (look at all the various responses on Stack Overflow!) Many problems can cause this error; I would like to document one specific case. In this example, the client is a PHP app using the Phalcon framework:
[Mon, 09 Apr 18 03:34:08 -0400][ERROR]  SQLSTATE[HY000]: General error: 2006 MySQL server has gone away
exception 'PDOException' with message 'SQLSTATE[HY000]: General error: 2006 MySQL server has gone away' in /path/to/ModelBase.php:
Stack trace:
#0 [internal function]: PDOStatement->execute()
...
#17 {main}
This error can be tricky to troubleshoot. I looked in three logs:
Viewing logs for a cluster of instances on Google Stackdriver Logging
StackDriver Logging is a great feature of Google Compute Engine (GCE). You pretty much need a centralized logging solution if you are taking maximum advantage of the features offered by GCE. For example, most production applications will run on a cluster of web servers. If you set up the cluster as a managed instance group on GCE, Google can auto-scale the size of the cluster based on traffic. The challenge is that it’s much harder to troubleshoot errors across a cluster. The requests that caused the error could be spread across any number of servers, with randomly assigned names. If load drops and the server pool contracts, you will entirely lose any log data on a server that’s auto-deleted. StackDriver Logging is the answer to this problem. Configure all servers to send all logs to StackDriver, and you can view all of your web server logs in one interface, with the entries in chronological order. View StackDriver Advanced Filter as a Gist on GitHub The problem is that the Stackdriver docs only explain how to select an instance by the instance ID, which is a random-looking string that is not visible in the Console. Further, if you have a large cluster of disposable servers, you would have to look up the ID for every instance. If an instance was deleted when the cluster was auto-scaled, you won’t even know what to look up. Therefore, it’s much better to search for the logs based on a human-readable server name. For example, assume that your servers are Google Compute Engine instances that are named [region]-[zone]-web-[id]. Here’s a filter to match on that naming convention: [sourcecode language=“plain”] resource.type=“gce_instance” logName=“projects/my-project-name/logs/apache-error” labels.“compute.googleapis.com/resource_name”:"-web-" textPayload:“execution time” [/sourcecode]
Protecting a RESTful JSON API from a CSRF attack
“Cross-Site Request Forgery (CSRF) is an attack that forces an end user to execute unwanted actions on a web application in which they’re currently authenticated” (OWASP definition)
CSRF is related to Cross-Site Scripting (XSS), but does not require the execution of Javascript or any other front-end code. In fact, APIs are increasingly vulnerable to CSRF attacks due to the emergence of single-page web applications. A single-page web application is a Javascript “client” application that executes in the user’s browser. The client application interchanges data with the server via API calls. There are many advantages to this architecture, but it does increase the attack surface for CSRF attacks. When the user authenticates, they receive a unique token with a limited lifetime, which is usually stored as a cookie. The token is passed to the server as a header on every API call, and the server may return a new token with an updated expiration time with every response.
Upgrade Ubiquiti UniFi Access Points (WAP) now to avoid KrackAttack
On October 15, 2017, security researcher Mathy Vanhoef announced the discovery of KrackAttacks, a serious flaw in the WPA2 encryption protocol that encrypts most WiFi connections. Using this method, an attacker can decrypt traffic from almost any wireless access point (WAP) and clients. Every WiFi access point will need to be upgraded with patch that prevents this attack. Ubiquiti has already released a patch for UniFi access points that addresses this vulnerability. However, the upgrade process may not be straightforward, depending on the age of your access points. The following process will ensure that you are running a safe version of the firmware (3.9.3.7537 or later). Note that any upgrade will result in downtime for each access point as it is upgraded, so you will want to perform a rolling upgrade if you have multiple devices that will be upgraded while people are using them.
Warning: CentOS/RedHat 7.4 installs FreeRADIUS 3 with breaking changes
When you run yum upgrade on a CentOS/RedHat 7 instance, you will be upgraded to 7.4. If you have a FreeRADIUS server, you will be upgraded from version 2 to 3, and your server will likely stop authenticating! Good times! Fortunately, the solution was not complicated for us, because we had good documentation.
Symptoms
Your radius server suddenly starts denying logins.
Diagnosis
The configuration file /etc/raddb/radiusd.conf has changed enough between versions 2 and 3 that you cannot re-use the old version. To get radius debugging output, stop the radiusd service, and run (as root):
Managing persistent disks on Google Compute Engine
It can confusing when you have multiple persistent disks on an instance running on Google Compute Engine. For example, a server may have separate disks for the filesystem root, MySQL data, logs, and /tmp. Once you’ve created the Compute Engine disks and attached each one to the instance, how do you know which Compute Engine disk maps to each volume on the instance? First, describe the instance to see a list of the attached disks:
Migration from GoDaddy to Wordpress.com hosting
I’ve migrated my blog from GoDaddy to a paid plan with Wordpress.com. I decided to trade flexibility for simplicity, since I don’t want to spend time fiddling around with the administration of this site. When I spend all day on IT, doing IT for a blog is no longer on my list of hobbies. With GoDaddy, you are responsible for all aspects of security, including updating Wordpress, updating themes and plugins, and installing a security plugin to block the thousands of known attacks against Wordpress. I have two major security concerns with GoDaddy. I had to allow insecure ciphers in order to connect to the shell on my site via SSH (or SCP). Why on earth haven’t they updated to a recent version of SSH?!? GoDaddy also requires you to purchase an SSL certificate from them to enable TLS on your domain. There’s no way to install a free certificate from Let’s Encrypt. I looked into enabling two-factor auth, but you have to manage it yourself with a plugin. With a Premium plan from Wordpress.com, SSL is enabled automatically with a certificate from Let’s Encrypt. I can use my domain name, and security is mostly handled for me. I can enable two-factor authentication. The downside is that I’ve lost some flexility; I can’t use my own theme or install my own plugins unless I upgrade to a Business plan. Also, I have to set up ads through Wordads.com to try to cover the cost of the site. I was fairly successful in covering the cost of hosting with Google AdSense; I’m not sure how effective WordAds will be.